Social Icons

May 28, 2012

Grow Flax Seed in a Home Garden

My adventure with the small grains, namely Flax Seed and Barley finally came to fruition. I harvested both grains about two weeks ago. I did not have the time to properly process Barley, so it all went to the chickens (who loved it!), but did process the Flax Seeds. It turned out to be a rather easy process. To harvest I simply pulled the whole plants and put them into the garden cart. I imagine, commercially they harvest just the seed heads with the machinery, but I cut or pulled the seed heads by hand and literally separated seeds from the shaft. The shaft is very useful in itself, our ancestors used it to make linen. But I will use it in compost, or even possibly as straw mulch.


The seed heads need to dry crisp before threshing, so I let these sit outside in the shade for a couple of weeks.


After the seeds were very dry, I just rubbed the seed heads between my palms so that the seed itself was separated from the surrounding seed head. The process was quite easy. Then I sifted this mess several times through a regular colander until most of the debris was gone.

Last few sifts involved a fan (do this outside!) to sift the seeds at a height of approximately twelve inches from the lower bowl so that the light-weight debris can be blown away and the heavier seeds remain.


And here is the final product! These flax seeds certainly do not look as clean as when you buy them in the store, but they are certainly useful and very nice.


All in all, my yield was about 1:20. I seeded two tablespoons of the flax seeds and harvested almost a quarter a pound. This venture is certainly worth trying, and I plan to seed these (now free seeds) in October or when it gets cooler, to harvest in the following Spring.

May 26, 2012

Shredding garden waste for compost: wood chipper, lawn mower, or else?

I have to admit, I spent quite some time researching the options of shredding my garden waste for composting, such as tomato, corn, okra, and other plants, as well as weeds, and the good stuff - your cover crops. Surprisingly, in this day and age of seemingly everyone growing a garden, there is very poor choice of garden waste processing machinery. I hate even saying "garden waste" as these spent plants are an awesome source of future nutrients and humus for the garden.

Anyway, it looks like we have two choices: a wood chipper and a mulching lawn mover. That's it. A reasonably priced wood chipper - under $1,000 - is still not an adequate choice! Most of these have a limitation of material thickness, up to 2 inches in diameter. Well, my corn stalks are at about that thickness, and okra plants can run even thicker. But even if we upgrade and go with the unit that chips 3 inches, we are still limited by "no green" restriction. These chippers are designed to handle twigs, not plants from the garden. Even if you pull a tomato plant, it would be kind of dry on the bottom, but green on the top. So, the wood chipper, unless it's a Fargo kind (which will run several thousand dollars), is not adequate, so, save your money.

A second choice is to get a mulching lawn mover at a price tag of $300 - $500 and run it over a pile of spent garden plants. This is much better than a chipper because it does not have size limitations, but to run it efficiently for this purpose the blade has to be frequently sharpened. Sharpening the blade involves taking out the spark plugs, then unscrewing the blade, and sharpening it with the hand file or some power tool. Then, putting the mower back together. Excuse me, I am a female. Not that I am afraid of power tools, but the process sounds too involved for what I am willing to do.

Accidentally, I stumbled upon another choice. This choice does not require electricity, gasoline, or any complicated maintenance. And, it accepts basically any thickness or green range of garden waste. Enter Felco. It is a hand pruner, and at a $55 price tag was a reasonable choice for my needs.


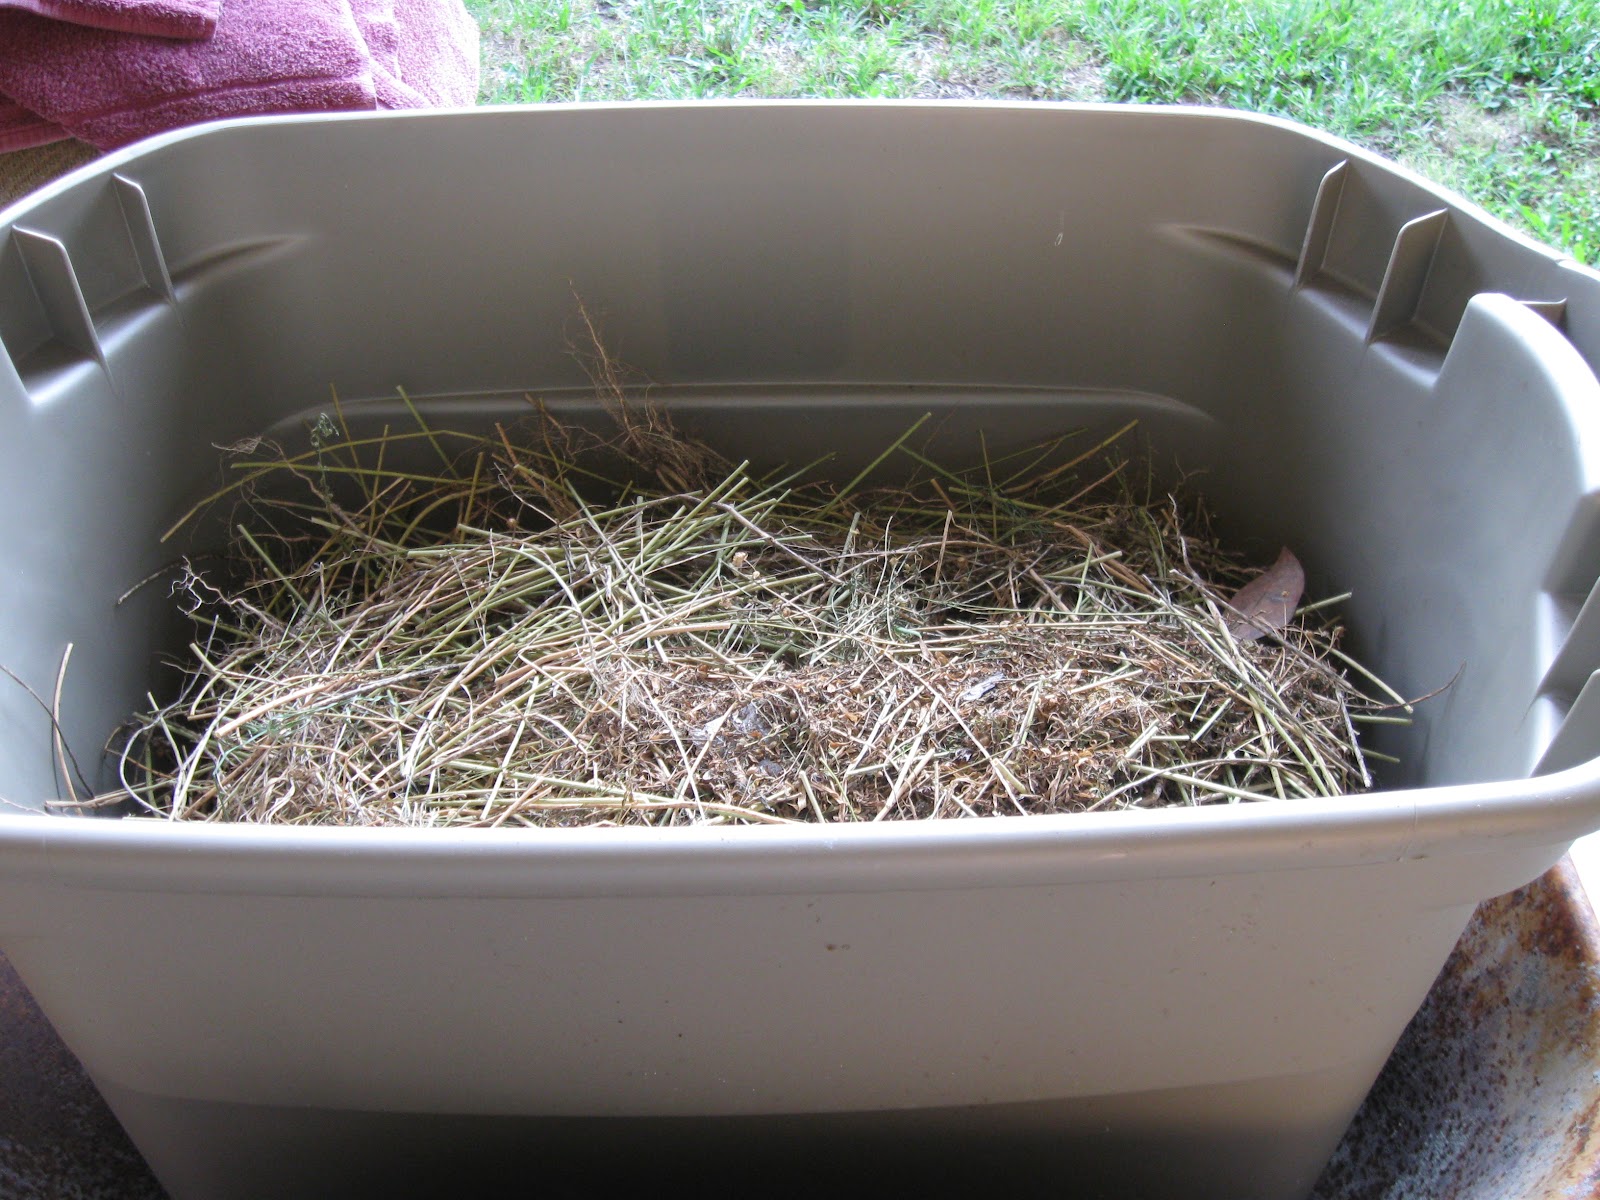
 It is made in Sweeden, not in China, so I imagine it will last a long time. It is incredibly sharp and very easy to operate. I harvested the last of the tomatoes from ten to twelve plants, pulled up the cages, and shredded the tomato plants to fill this five gallon bucket in two hours total. It is amazing that a whole mess of tomato plants that would normally take several cubic feet by volume if not shredded, took only this little bit of space in a five gallon bucket.


I cut the plants into chunks of about two inches long. This would be sufficient to throw into the compost pile to speed up decomposting, or even use this mass as mulch (which is what I did, mulched around my cubanelle peppers). I researched quite a bit on a brand and make, and settled on this tool because it had some outstanding reviews on Amazon, plus, the shipping was free. The only thing I wish it had - some kind of harness, so I could carry it with me at all times: that's how much I love this little tool!

You might also like these posts:

May 20, 2012

May Activities in Florida Garden

Whew! Somebody aircondition Florida, please! It has been an extremely hot spring.

At the end of May we usually finish harvesting spring season vegetables and put our garden tools away till September, for the most part. Even harvesting becomes a chore because it is too hot to go to the garden and pick tomatoes. I let quite a bit of tomatoes to fall to the ground, luckily, chickens picked them up. I sometimes let the chickens into the garden at the end of the harvest season to clean up.

Now it's a good time to preserve the harvest. I usually just can crushed tomatoes. It's the easiest way and the end product is very versatile. Tomatoes are pretty easy to can. Because they are acidic, you can use water bath method, no pressure canning required.


If you planted tomatoes in succession, you might still have quite a bit of green tomatoes in the garden; these will continue to ripen till July. This year I want to try growing tomatoes over the summer, in complete shade. This might or might not work, time will tell, but it's a worthy experiment.

Other than that, cowpeas and okra are Florida gardener's best friend. They love heat and pretty non-demanding. Plus, both can be used as a great compost builder.

You might also like these posts:

Types of tomatoes: determinate or indeterminate?
How to replant tomato seedlings
Sturdy tomato cages, 10 Pack - free shipping

May 1, 2012

Holy cow, cabbage in Florida

Ferry-Morse seeds did it again! Who could have thought that we could grow nice firm heads of cabbage in our Florida heat, and harvest them in May! But, stranger things have happened. Harvested this baby today, and it weight at over three pounds of organic fresh cabbage:


I planted these seeds somewhere around the end of January, and started harvesting cabbage about two weeks ago, so kind of close to what the package said (66 days to maturity).


Now, these seeds are not open-pollinated, they are hybrids, most likely, so even if I was adventurous enough to save the seeds, they would not perform the same as their parent. But for a paltry $1.59 (and I only seeded maybe a third of the package, if that), I would harvest probably 30-40 pounds of cabbage, if not more. This variety, just like any type of cabbage, needs moist conditions, so I have to give it some water every day. It also is susceptible to snails, but they do not do a lot of damage. Some leaves, mostly the outer ones, would be chewed up, and these go into the compost or to the chickens. There is still a lot of fresh organic cabbage left for the humans. I would certainly plant this variety again, in the fall, as cabbage is not afraid of freezes.
 

Florida Gardening

Florida Gardening Blog

Visitors from all over the world

Grow Your Own Food

Grow your own food, be independent, healthy and happy.