Social Icons

August 19, 2011

Germinating Bird Seed for the chooks

"Chooks", that's what they call chickens in Britain. I have some too, very young ones, only two weeks old. Exactly four Plymouth Rock females, four Red Star females from MyPetChicken.com and ten Buff Orpingtons of unknown gender incubated by me, so eighteen chooks all together.

Usually when I have young chickens I carry them by hand into the outdoor play area in the morning and then back again, by hand, into their brooder at night. But recently my work schedule changed where I have to leave early in the morning and come back home late at night. I did not want to deprive the chooks of needed vitamins and entertainment, so I came up with a plan that I would grow greenery for them in a container. The plan worked very well. I got a six-pound bag of bird seed from Tractor Supply for about five dollars, so it's less than a dollar a pound, and seeded it liberally in a container. The germination of it was exceptional, very thick and lush greenery as a result. Chooks loved it!


The good thing about the bird seed is that it contains a few different types of grain: wheat, milo, millet and even sunflowers. There are other ingredients as well, but I threw away the package so cannot recall exactly. Some people like to juice germinated wheat, and that's a good healthy thing. The point is that you can get your grains for germination pretty cheap; bird seed is sold practically in every pet department at WalMart or your grocery store. And you can even grow this bird seed for the future seed if you let a few plants mature and go to seed. Way to go, I am pretty pleased with that project. 

August 14, 2011

Germinating cucumber seeds in containers

August and March are the prime time to seed cucumbers. While it is usually advised to seed cucumbers and squash directly into the garden, because these plants have a long tap root, I prefer to germinate them in small containers or styrofoam cups. If you work as well as have family obligations, it is easy to neglect cucumber seeds who need constant moisture to germinate.

Usually gardeners complain that cucumber seeds are not germinating, while not giving these seeds the optimum environment. Cucumbers need to be seeded at the most a quarter inch below the surface and kept constantly moist to germinate. Old seeds might not germinate, and by old I mean over three years old. The smaller the seed, the less storage time they have.

I like my germination to be controlled, that is, I know how many seeds I seeded and how many plants germinated. If we put the seeds directly into the garden, some valuable time and space can be wasted while waiting needlessly for the plants to sprout.

I usually put one seed per cup of Miracle-Gro potting mix, and water from the bottom so that the soil is moisturised throughout:


It is very difficult to provide these ideal conditions when seeding directly into the garden. Granted, if you are seeding a lot of plants, container method would be too time-consuming. But for the home gardener who plants maybe six or ten cucumber plants container method is actually easier and less stressful.

The trick to planting cucumbers from containers is not to let them grow too large. Unlike tomatoes or peppers where we wait for the first true leaves to appear before replanting, I replant cucumbers just as soon as first seed leaves are large enough, usually a couple of days after sprouting, but before even the first true leave appears. This will ensure that the tap root had not yet a chance to develop thus not hindering the young seedling development. This is the stage I replant cucumbers and squash into the ground:


In August it is still excruciatingly hot, so plant these young ones where they have afternoon shade. If there is no such spot in your garden, shade them with a shade cloth or whatever concoction you can master so the tender seedlings do not dry out in a scorching sun.

On a last note, keep them watered twice a day, morning and afternoon, and provide some support for them to grab on. Seed again in about two weeks, and then again, second week of September. This schedule will ensure not only that you will have some crop, but some continuous crop as well.

August 10, 2011

Growing Luffa Part 2

Luffa has been growing pretty nicely. The plant is not bothered by insects, heat or anything really. It just keeps advancing farther and farther on all available support. Seven weeks from seeding it started showing some nice young fruit:

Luffa Fruit

The fruit looks just like zucchini and probably tastes like one. Right now it is a bit early to pick it, but possibly in a week or so it will be ready for the grill. But the main reason I am growing it is for the sponges. The plant is very prolific, it is loaded with clusters of buds that will produce fruit:


Just like any other type squash it grows fruit on new vines, so the more room it has to spread out, the more fruit it will produce. Since this vegetable originated from India and China, it is well suited to growing in Florida. Since it takes about five months to mature, it is probably too late to seed it now, but make a note on your calendar to seed it in March if you want some free organic sponges, beauty and possibly some tasty fruit.

August 7, 2011

How to transplant tomato seedlings Part 1

August and March are prime months in Florida for replanting tomato, pepper and eggplant plants. Whether you germinated these seedlings from seed or purchased ready seedlings from the store, it is time now to put them into the ground. They need about a month and a half to start pollinating, so that brings us to the beginning of October for the fall season and sometime in April for the spring season.

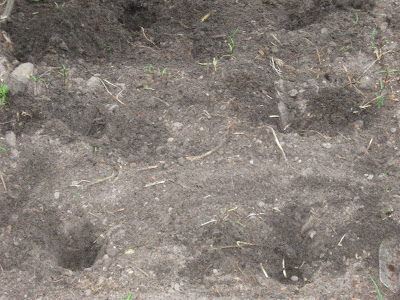
You should have the soil ready by now, so mark planting holes about 18 inches on center:


Now, dig one hole with the small garden trowel to try to dry-fit the tomato into the hole:


We can see from the previous picture that the hole is too shallow, too much of the stem is above the ground. Usually we would want eighty percent of the seedling to be buried under to promote root growth from the stem as well as cool the roots and allow them to reach the moisture and nutrients. Dig some more dirt out and dry fit again:


Now it looks much better. We can gauge that most of the plant would be buried under the ground level.

Granted, my beds are double-dug to at least a foot deep so I can accommodate eight or ten inch hole for the transplants. If your beds cannot go as deep and the transplants are tall, you can horizontally lay them, that is dig the hole as deep as you can, put the transplant in and lay the rest of the stem on the ground, covering it with the soil. This will allow the roots to grow from the stem. The roots are the heart of the plant, the better developed the root system is, the healthier the plant will be.

To take the tomato out of it's container, we put the stem between index and middle finger and turn the container upside down:


Now gently lower the seedling and the root ball into the ground and fill with soul tapping around the stem lightly. As we can see, most of the transplant is covered with the soil, just leaving the top leaves above the ground. You do not have to repeat this process for each of the transplants. Generally, the soil in you garden will be of the same relative depth, so you only have to try one transplant to determine the depth of the holes for the rest of them.


An old Indian tale goes that you should put a banana peel and an egg into each tomato hole. This tale has merit; banana peels provide potassium and an egg provides calcium to the growing tomato seedling. When an egg decomposes, it provides sulfur for the fruit. In my garden banana peels, egg shells and other organic waste is added constantly to the soil, but if you are planting in a new garden, or a garden that is not very fertile, this Indian advice is worth a try.

Water the seedling at the stem thoroughly. Keep watering if there is no rain, every day for about a week, that's how long it takes for it to get established. After that, again, if there is no rain, water every other day or twice a week. A good rule of thumb, literally, is to stick a finger into the ground and see if it feels moist at the second knuckle. If it does not, water. I usually give my tomatoes a half-gallon watering twice a week at the stem, not overhead.

August 3, 2011

What can we plant in August in Florida?

August is a very important month in terms of preparation for a fall harvest. All warm season vegetables that take two to four months to mature need to be seeded or transplanted into the ground in August so they can be harvested before Thanksgiving. Here in Florida it's spring planting all over again, with a bit of a twist.

Cucumbers, summer squash, winter squash, pumpkins, beans and corn can be seeded directly into the garden now. Granted, Florida has three growing zones, so gardeners in each zone should adjust their planting schedule accordingly; the rule of thumb, North Florida should start planting earlier, followed by Central Florida, and then South Florida can wait till the end of August to seed these vegetables:


It is advised to seed gourd family directly into the garden because these vegetables have a long tap root, or the root that grows vertically into the ground. If these seeds are germinated in containers, there is a danger of the tap root to make a round ball and halter root development. I, however, learned a trick to transplanting these vegetables from containers: let the seed germinate in a styrofoam cup and then immediately transplant it into the garden as soon as first true leaves appear. This method eases the seed germination because usually the soil in a container is better than the soil in the garden, as well as we can keep the soil moist and close to ideal condition if we germinate in a container.

It is better to split  cucumber planting into two parts, two weeks apart. Cucumbers have a very short harvest time, so by planting two successive plantings we can enjoy our cucumber crop longer.

Amazingly, cowpeas can still be seeded in August in all three zones to provide green manure and some awesome harvest.

Tomatoes, peppers and eggplants should be transplanted in the garden in August. If you missed seeding these vegetables in July, you can buy them in a box store and plant into your garden. My peppers are not ready yet to be transplanted, but they will be in a couple of weeks. Peppers and eggplant take longer to get to the transplanting size:


Tomatoes are screaming to get into the soil. This weekend, weather and my own energy permitting, most of them will be transplanted. When transplanting tomatoes, dig a deep hole so that you could accommodate eighty percent of the plant, only having a few leaves sticking out. This will allow the roots to grow from the stems as well as keeping the roots cool:


Since August is a very hot month in all Florida, it is better to plant tomatoes, peppers and eggplant behind some taller plants so they could be shaded from an afternoon sun. If this is not possible, then try to use some supports with the shade cloth. Water the transplants daily if there is no rain and mulch as soon as possible to give them needed moisture and coolness.
 

Florida Gardening

Florida Gardening Blog

Visitors from all over the world

Grow Your Own Food

Grow your own food, be independent, healthy and happy.