It's September, finally! We can get ready to start our most productive and enjoyable fall season.
I am cleaning my beds, ridding them of summer weeds, to prepare for the fall planting. This summer I let my beds overgrow with weeds, just did not have the time to weed or plant any cover crops. But, too many weeds is not as bad of a problem because all of them can be composted beautifully.
I use my darling Lawn Boy with the mulching bag to shred the weeds into small pieces.
It does a great job at that, and fast! I can shred a pile about 5 foot by 3 foot high in about five minutes.
Not every time, but quite often, I also mow the lawn with the mulching attachment to collect the grass for the compost.
Here's the result of mulching a whole bunch of weeds and spent tomato vines from one of the beds. Took me just a few minutes to do this.
All that stuff goes into the chicken composting "bin". They love it. They pick out every last weed seed, as well as turn the compost many times while fertilizing and aerating it.
If you don't have chickens I do not recommend composting this way (shallow pile), because it is not hot enough to kill the weed seeds.
But composting in a low pile as opposed to the high piles with turning them over is much easier on the gardener's back. You can imitate chickens by raking the pile a few times. The other method I tried was to fill black plastic garbage bag 2/3 with chopped weeds, adding about a gallon of water, and then leaving it in the sun. It makes a nice compost in about a month or two.
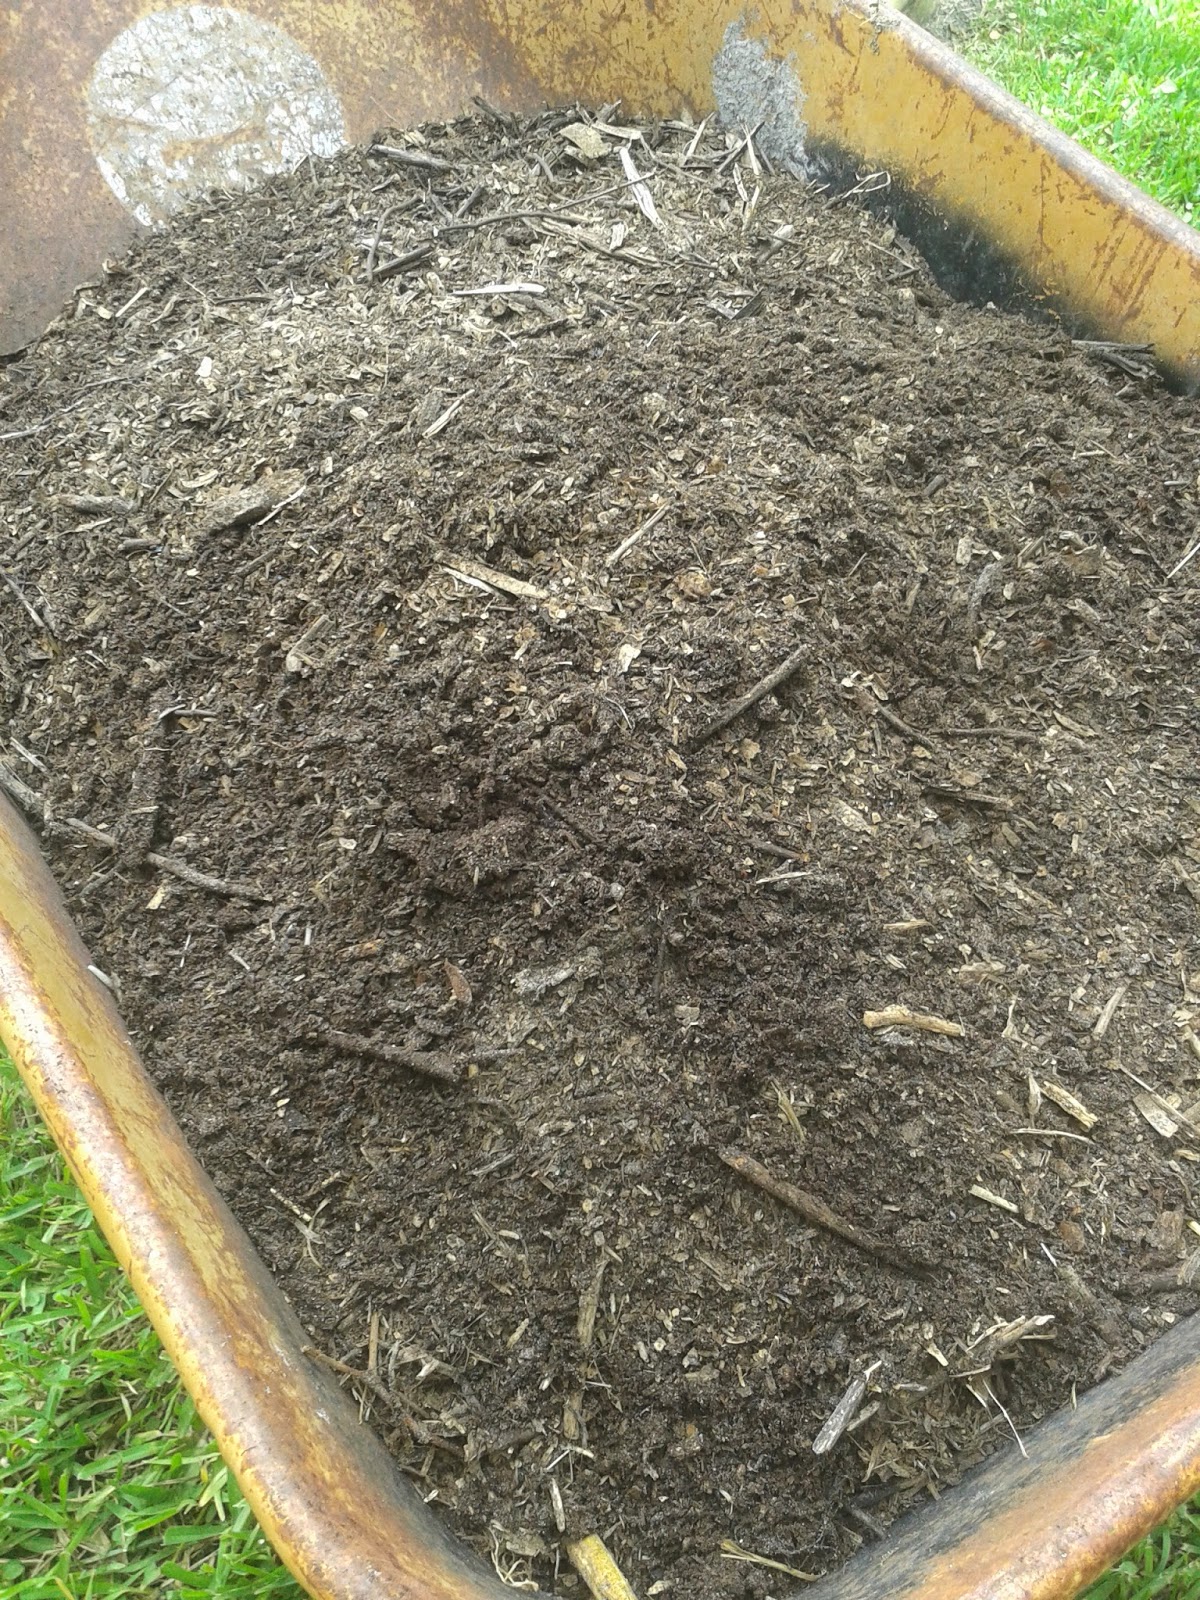
And here is the result of chicken hard work:
It is nice, crumbly, free of weeds, and very fertile.
It is going on the top of my garden bed soil. I don't dig my beds, they are just getting layered in material, and worms do the rest of the work.
Showing posts with label Composting. Show all posts
September 1, 2014
February 16, 2013
Planting Vegetables in Wood Chips
I am trying something new. Instead of planting in soil, I am plating in wood chips. I did not plan it like that, it just sort of happened. I had a new set of raised beds built, but did not have soil for them. Then, after some research, I found that the beds can be filled with free wood chips that the power company delivers. The plan was thus born. I had a huge pile of wood chips delivered to my front yard, and there I went. Loading wheel barrows of chips and loading my new raised beds.
The wood chips themselves are not just pieces of wood, there are also chopped up small green twigs and even some palm leaves. That is a good mixture, although a bit poor on nitrogen (green matter), but still not totally devoid of this important nutrient.
Next thing I did was to seed some legumes. I am preparing this bed for the Spring planting of tomatoes, peppers, and eggplant. So the fast maturing legumes will serve as a cover crop. I planted the whole bed of black beans, just sprinkled with soil on the top of the seeds. Here they are starting to sprout:
And the rest of the beds I planted with cowpeas with the intention of tilling them in. I left a portion of the bed completely with no soil, as my test bed. Looks like cowpeas do not care if they don't have the soil. They are sprouting just as nicely:
I have cardboard on the bottom of these beds. Once cardboard rots it will allow the roots of my vegetables to penetrate even deeper into the soil below, under the decomposed wood chips. I do expect this whole concoction to pack down very heavily, but then I can always call the power company and have another load of wood chips to be delivered and added to these beds.
I am very hopeful of this growing method, and in fact if this goes well, my next plan is to raise all my existing beds and add piles of wood chips to them.
May 26, 2012
Shredding garden waste for compost: wood chipper, lawn mower, or else?
I have to admit, I spent quite some time researching the options of shredding my garden waste for composting, such as tomato, corn, okra, and other plants, as well as weeds, and the good stuff - your cover crops. Surprisingly, in this day and age of seemingly everyone growing a garden, there is very poor choice of garden waste processing machinery. I hate even saying "garden waste" as these spent plants are an awesome source of future nutrients and humus for the garden.
Anyway, it looks like we have two choices: a wood chipper and a mulching lawn mover. That's it. A reasonably priced wood chipper - under $1,000 - is still not an adequate choice! Most of these have a limitation of material thickness, up to 2 inches in diameter. Well, my corn stalks are at about that thickness, and okra plants can run even thicker. But even if we upgrade and go with the unit that chips 3 inches, we are still limited by "no green" restriction. These chippers are designed to handle twigs, not plants from the garden. Even if you pull a tomato plant, it would be kind of dry on the bottom, but green on the top. So, the wood chipper, unless it's a Fargo kind (which will run several thousand dollars), is not adequate, so, save your money.
A second choice is to get a mulching lawn mover at a price tag of $300 - $500 and run it over a pile of spent garden plants. This is much better than a chipper because it does not have size limitations, but to run it efficiently for this purpose the blade has to be frequently sharpened. Sharpening the blade involves taking out the spark plugs, then unscrewing the blade, and sharpening it with the hand file or some power tool. Then, putting the mower back together. Excuse me, I am a female. Not that I am afraid of power tools, but the process sounds too involved for what I am willing to do.
Accidentally, I stumbled upon another choice. This choice does not require electricity, gasoline, or any complicated maintenance. And, it accepts basically any thickness or green range of garden waste. Enter Felco. It is a hand pruner, and at a $55 price tag was a reasonable choice for my needs.
It is made in Sweeden, not in China, so I imagine it will last a long time. It is incredibly sharp and very easy to operate. I harvested the last of the tomatoes from ten to twelve plants, pulled up the cages, and shredded the tomato plants to fill this five gallon bucket in two hours total. It is amazing that a whole mess of tomato plants that would normally take several cubic feet by volume if not shredded, took only this little bit of space in a five gallon bucket.
Anyway, it looks like we have two choices: a wood chipper and a mulching lawn mover. That's it. A reasonably priced wood chipper - under $1,000 - is still not an adequate choice! Most of these have a limitation of material thickness, up to 2 inches in diameter. Well, my corn stalks are at about that thickness, and okra plants can run even thicker. But even if we upgrade and go with the unit that chips 3 inches, we are still limited by "no green" restriction. These chippers are designed to handle twigs, not plants from the garden. Even if you pull a tomato plant, it would be kind of dry on the bottom, but green on the top. So, the wood chipper, unless it's a Fargo kind (which will run several thousand dollars), is not adequate, so, save your money.
A second choice is to get a mulching lawn mover at a price tag of $300 - $500 and run it over a pile of spent garden plants. This is much better than a chipper because it does not have size limitations, but to run it efficiently for this purpose the blade has to be frequently sharpened. Sharpening the blade involves taking out the spark plugs, then unscrewing the blade, and sharpening it with the hand file or some power tool. Then, putting the mower back together. Excuse me, I am a female. Not that I am afraid of power tools, but the process sounds too involved for what I am willing to do.
Accidentally, I stumbled upon another choice. This choice does not require electricity, gasoline, or any complicated maintenance. And, it accepts basically any thickness or green range of garden waste. Enter Felco. It is a hand pruner, and at a $55 price tag was a reasonable choice for my needs.
I cut the plants into chunks of about two inches long. This would be sufficient to throw into the compost pile to speed up decomposting, or even use this mass as mulch (which is what I did, mulched around my cubanelle peppers). I researched quite a bit on a brand and make, and settled on this tool because it had some outstanding reviews on Amazon
, plus, the shipping was free. The only thing I wish it had - some kind of harness, so I could carry it with me at all times: that's how much I love this little tool!
You might also like these posts:
September 27, 2011
Lazy compost pile
If you grow squash and you don't have a compost pile going, here's a double whammy.
Squash is a heavy feeder, in fact the best squash you can grow is on a compost pile itself. At the same time squash requires a lot of room. Usual spacing for squash is about three feet on center, but it would love to crawl even farther if you allow it.
So the solution is to grow squash next to the compost pile, or start one next to the growing squash. Here's the squash I have going, it's a yellow straight neck variety. Yellow squash is pretty easy to grow, and I love easy.
Squash is a heavy feeder, in fact the best squash you can grow is on a compost pile itself. At the same time squash requires a lot of room. Usual spacing for squash is about three feet on center, but it would love to crawl even farther if you allow it.
So the solution is to grow squash next to the compost pile, or start one next to the growing squash. Here's the squash I have going, it's a yellow straight neck variety. Yellow squash is pretty easy to grow, and I love easy.
Designate a space next to the squash and start piling up some garden waste. Break up spent plants into manageable pieces and add to the pile. Weed your garden and add weeds to that pile as well. The only thing you have to watch for is not to add weeds that have gone to seed because this pile will not be hot enough to kill seeds. The regular compost pile that is capable of killing the seeds should be at least three feet high. We are not building that huge of a pile for the purpose of lazy composting, so eliminate weed seeds from the pile.
At this point it looked like the pile was lacking carbon, so I added a layer of chicken coop cleanouts, partially decomposed wood shavings. Now the pile looks balanced.
For a compost pile you need roughly equal amounts of green and dry matter. Green matter includes weed greens and kitchen waste. Dry matter includes anything that was once a green matter but dried out, such as fallen leaves, pine needles, palmetto leaves, etc. If you don't have any of these, shredded newspaper and office paper will do as well. Use your imagination.
Keep the pile watered and turn it once a week until squash takes over. You can keep adding to the pile until squash sends the stems over it. Then just wait until the sqush is done and dig both, compost pile and spent squash leaves and stems into the ground to enrich the soil.
September 22, 2011
To ferilize or not to fertilize?
...that is the question. I meant synthetic fertilizers in that context.
Strict definition of organic gardening does not allow use of synthetic fertilizers, and for a good reason. If we are in it for a long term then we need to build the soil, not just feed a plant. Soil building includes adding a lot of organic matter so that the soil becomes moisture retentive as well as drainable and rich in nutrients for the plants themselves and supporting fauna - earth worms and other organisms.
But what do you do if you are in an emergency situation - your plants need feeding but you did not have an opportunity to properly build the soil yet? I would compromise at this point, as long as you have a long-term plan on building rich soil in your garden.
What kinds of synthetic fertilizers should we use? I would forgo generic 6-6-6 or 10-10-10 NPK (nitrogen (N), phosphorus (P) and potassium (K)) because while these are just enough to sustain plant's requirements, they are not sufficient to feed a human body. We are in it for the healthy food, are we?
In an emergency situation like that, for example if I do not have much time until the season's end and the plants are not doing so well, I would add some synthetic fertilizer, but one that contains more minerals. Here's the one I use in these situations:
Strict definition of organic gardening does not allow use of synthetic fertilizers, and for a good reason. If we are in it for a long term then we need to build the soil, not just feed a plant. Soil building includes adding a lot of organic matter so that the soil becomes moisture retentive as well as drainable and rich in nutrients for the plants themselves and supporting fauna - earth worms and other organisms.
But what do you do if you are in an emergency situation - your plants need feeding but you did not have an opportunity to properly build the soil yet? I would compromise at this point, as long as you have a long-term plan on building rich soil in your garden.
What kinds of synthetic fertilizers should we use? I would forgo generic 6-6-6 or 10-10-10 NPK (nitrogen (N), phosphorus (P) and potassium (K)) because while these are just enough to sustain plant's requirements, they are not sufficient to feed a human body. We are in it for the healthy food, are we?
In an emergency situation like that, for example if I do not have much time until the season's end and the plants are not doing so well, I would add some synthetic fertilizer, but one that contains more minerals. Here's the one I use in these situations:
It is quite expensive, about eleven dollars for this bottle, but it is worth it. First, it covers a lot of ground, literally. Second, it contains trace minerals such as copper, iron, zink, magnezium and calcium. Plants can survive just on NPK, but evidently they need more than that, not mentioning that we, consumers of the fruit, need these minerals. Speaking of calcium, you can add it quite inexpensively to the plants that need it the most: tomatoes and peppers. Just get crushed oyster shell at Tractor Supply, a huge forty pound bag for about eight dollars, or crush egg shells finely and sprinkle around the plants. Calcium is needed to prevent blossom end rot in tomatoes and peppers.
Fertilizers in this Miracle Gro mixture are not evenly balanced, like 10-10-10, for example. Instead, they are more like 9-4-12, so they are heavier on nitrogen and kalium. Folks at Miracle Gro must have figured it out.
Bottom line is, nothing will replace good organic soil building, for the long and short term as well. But if you see that your plants are stunted and growth season end is within reach, use the synthetics to give your plants a boost, but select a good one and plan for future organic sourses of fertilizers, namely cover crops and compost building.
September 19, 2011
Do you have a counter top composter?
If you are a gardener, and you are concerned about health quality of your produce, and you have kitchen vegetation leftovers, then, well... you should have a collector for your kitchen waste.
I simply use a 34 oz plastic coffee can for this purpose:
Now, it is not mandatory to have plastic can like I have. It can be metal, but be aware that it will rust in a number of months, although it is not a big deal if you are a coffee drinker, like your's truly. Just replace it with a new one. The point here is that you have some sort of container to collect your kitchen waste and you do add it to your garden soil.
What can go into that pile? A short answer would be - anything plant based. A detailed answer would be - all your vegetable peels, including onion, garlic, carrot, etc., also broccoli stems, cabbage stems, you got the point. Coffee grounds with the filters, tea bags and any non-cooked vegetable leftovers.
Now, for the cooked ones - I would not recommend putting spaghetti and rice there. Not that it cannot decompose, anything will decompose with time outside of plastic, but these items will attract rodents and flies, and you do not want that. Absolutely no oil or other buttery products. These will clog up your soil and will take ages to decompose. No meat. Granted, meat is great fertilizer for your plants, but it will attract mice and ants, and this will present the problem, unless you bury these items very deep into the ground.
So, once your container is all filled up, just dig a hole about a foot deep in the unused portion of your garden and bury the contents into that hole. You would be surprised to find that after just a few weeks all that stuff will be reduced to nothing just due to the workings of nature. Happy composting!
July 28, 2011
Cowpeas as a cover crop and green manure
What a versatile vegetable! Not only it is insanely productive, not bothered by pests and requires little attention, it also provides fertilizer for the garden even after it stops producing. The idea of a cover crop is to grow nutrient-rich plant, such as legumes, and plow it under to improve soil fertility. A cowepea in Florida is just that plant. We can plant cowpeas from March to September and dig them in even after we harvest the crop. Ideal time for digging cowpeas in as a green manure is when they are still young, have lush green leaves and their stems are not too thick, like this:
Granted, if you plow cowpeas under at this stage you will forgo most of the crop. If you need to improve soil fertility in a hurry, then this method is acceptable, after all a pound of cowpeas at a grocery store is only $1.69 or even cheaper. But in the event that you want to have a harvest and utilize cover crop quality of cowpeas, the more mature stage of this vegetable is still acceptable. Below is a picture of a cowpea patch that I kept harvesting until the plants are mostly dry:
In this situation you will just have to chop them smaller, for the stems - about three to four inch long, if you have patience.
Then just dig the stems and leaves into the ground. It will help if your shovel is sharp because you might have to break stubborn stems with it:
Keep the soil moist, water it if there is no rain. It might also help to cover the soil with newspapers or cardboard to keep it moist. This cover crop should decompose in about a month, just in time to transplant tomatoes into the ground.
You might also be interested in:
How to shred your garden waste mechanically
When to harvest cowpeas
How to start growing cowpeas
How to shred your garden waste mechanically
When to harvest cowpeas
How to start growing cowpeas
Labels:
Composting,
Garden Designs,
Vegetable: Cowpea
Subscribe to:
Posts (Atom)