Social Icons

May 20, 2016

Natural Plant Supports in the Garden

Moving away from the conventional. Towards natural, easy, less-work. Evolving.

When I just started gardening, about ten years ago, I joined the league of hardware store customers, buying plant supports, stakes, cages and other inventions, and then installing and removing these contraptions every gardening season. It is a lot of work.

Ideally, in my "ultimate" garden there will be no outsiders. Plants would thrive together relying on each other's community-valuable qualities, among which is the ability to support climbers.

Another thing to mention, is that in Florida we don't have to worry about "full-sun" requirements. If anything, there is too much full sun in the Summer, and for the most part in the Winter too. Shade is welcome in Florida gardens. And with shade come trees. Yes, it is beneficial to have trees in the garden.

Cucumbers are cool-loving plants. Naturally, we would want to start them from seed when the last frost had passed, something around the end of February. But in doing so we are inviting cucumber borers whose season coincides with this traditional cucumber planting time. Should we wait longer, and it is too hot for the cucumbers to thrive.

This year I experimented with seeding cucumbers in April, under the trees. Turns out this was a smart decision.


Here's five cucumber plants living happily in the same container under a wax myrtle tree. Even if I step outside now and the air temperature is in the 90's, it feels much cooler next to the fence under this tree. Cucumber does not seem to mind not having "full sun". On the opposite, it likes cool moist ground, plenty of small branches to grab on, and dappled shade.

The wire around the plant is to protect it from my ducks. If you don't have other two-legged hooligans in the garden, you don't need the wire.


This is very encouraging. And I will continue experimenting and seeding cucumbers under other trees throughout the summer. 

A side note - I believe planting in containers next to the trees is the way to go, versus digging the hole next to the tree roots. An additional benefit to having a container is that when you water the plant, some water will trickle down to the tree roots and feed the tree.

P.S. This cucumber is Sumter. I love this strain, it is tasty and resilient.


February 10, 2016

Protect Papaya trees (and others, like coffee) from frost

Tonight it will be, hopefully, the last danger of frost night for this season. It usually works like that, when plants need to be covered, the weather is the nastiest and most unfriendly to the poor person who has this task at hand. I had to struggle with the comforters to cover my coffee forest. The trees are quite tall now, and the blankets just did not want to stay put. Finally, after much effort, coffee is covered, and probably grateful. Here it is. Peekaboo!


In the Spring, after coffee stops fruiting - it seems like it never stops fruiting though - I will prune the trees to about four feet of height to make it easier to cover next winter, and to renew the trees. They are supposed to be pruned of dead wood and old branches.

One thing I need to mention is that if there is hard frost coming, something like 28F, these quilt covers will not be sufficient. On cold hard freeze nights I use real comforters on my coffee trees.

Papaya is more tolerant.

Or maybe it is easier to get and grow.

But, for one thing, it is difficult to cover the whole papaya tree, as they usually are pretty tall, and secondly, they regenerate after frost damage rather easily. I normally, just wrap the trunk with the blanket and let the leaves to be damaged. Come spring, papaya will grow new leaves and branches.


Here is papaya tree that is probably four years old. It gets damaged every year, but then it grows new stems from the trunk (that was wrapped), and continues fruiting with abundance.


Keep warm tonight, and before we know, it will be Spring and new gardening adventures here in sunny Florida.


January 30, 2016

Coffee Seedlings! Growing coffee trees from seed in Florida

In one of my previous posts I talked about my coffee forest consisting of four coffee trees. At the time of this post I planted about twenty seeds from my own harvest. I have never done this before. From what I read on the Internet, coffee can take somewhere from two to six months to germinate from seed.

This morning I was so excited to see two of the seeds sprouting!


So, it's been about two months since planting. As you can see, I just used a regular seedling tray, a leftover from some plants I bought some time ago, that I filled with potting mix. The tray sat on my counter, covered with wrap. Temperature was in the 60's to 70's the whole time, as it is Winter now in Florida. Quite possibly they would've sprouted earlier if the temperature was higher.

However, I would not stand by that statement. I don't know enough of sprouting coffee. Maybe it sprouts in cooler temperatures in anticipation of spring.

I had a good harvest from my existing coffee trees. They are easy to grow and are fun to look at. I am certainly willing to expand my coffee forest to as many trees I can get my hands on, or however many will sprout.

January 28, 2016

Florida Fall Colors

Florida is different. It is the end of January, and we are having a typical "up-north" September weather here in Central Florida. It is rainy, gloomy, and quite cold, by the Florida standards, even during the day. But look, we have fall colors. I enjoy a variety of trees in Central Florida, and some of them even change colors. This is a rare, short-lived sight. Soon the trees will shoot new leaves, overnight, and Spring is just around the corner.


If it were "up-north", we would be eating the last of our canned tomatoes and other vegetables, and keeping fallen leaves in the piles to compost under the blanket of snow. In Florida we are starting tomatoes and pepper seeds on the top of the fridge. We just recently had our first and possibly last frost night. Some tender tropicals were damaged.

I took care of covering my coffee trees and remaining tomato plants. Papayas had some damaged leaves, but the fruit did not suffer. Hopefully, this was the last frost. It is quite a chore to cover up tall trees.

Soon box stores will start selling seeds again. Funny, management thinks in "up north" terms too. They only know of spring planting season, even in Florida, where we garden mostly in winter.

This year I will not start seedlings inside. In about a month I will plant the seeds - meaning tomatoes and peppers - right in the soil, under inverted jars. This way I will skip transplanting and will let the plants establish themselves where they may. I also will be experimenting planting tomatoes under papaya trees for natural support, as well as under pigeon peas that I planted in the garden as a manner of nitrogen-fixing plant as well as natural stakes for tomatoes.

December 29, 2015

Growing Papaya in Florida

If you like potatoes, you will love Papaya.
If you like zucchini, you will love Papaya.
If you like melons, you will love Papaya.

Even if you have a brown thumb, you can grow Papaya.

Papaya is arguably the easiest fruit/vegetable to grow in Florida. It did not originate here, but it is easily adapted. The climate is just perfect for this hardy and non-demanding plant. It does get damaged by the frost, but then quickly regenerates from the stem or root, in most cases, and continues on growing and fruiting.

Sadly, spoiled by the convenience of pre-packaged and pre-processed traditional vegetables, even Floridians are not too familiar with this incredible plant. It is believed that it originated in Central America, however, it's been grown in Asia for many centuries. Knowing how easy, even invasive it can be when a few seeds are dropped on the ground, I would not doubt that once the fruit got on board of some ancient vessel, it spread over different continents with little help from human gardeners.

It is still an "exotic" fruit in the US, however it is getting more attention throughout "health nut" community due to its unbelievable concentration of all the good enzymes, vitamins, and minerals, as well as being a low-glycemic vegetable despite tasting just as good as a potato or squash, cooked.   

Usually, people buy papaya ripe in the store and eat it like fruit, or melon. But green papaya from your own tree in the backyard is even more versatile. It is next to impossible to buy green papaya in the regular store, that's why very few people know how to cook it or what to do with it.


Pictured above, is my preparation for a delightful low-guilt baked "potato fry". This is green papaya sliced to about 1/8 or less of thickness, then baked at 400F for about 30 minutes, or until done. If you like potato chips, you can slice papaya even thinner and they will come out almost as crunchy. Believe it or not, this whole tray is baked on just one tablespoon of coconut oil. But if you want, you can "shake and bake" them in oil and spices for a richer taste.

Papaya is a neutral vegetable in taste, just like zucchini or squash. Therefore, it responds well to any type of seasonings. I like my "fries" spicy, so I sprinkle salt and cayenne on these fries, but I also tried sprinkling cinnamon and paprika for a more Holiday taste, and they came out delicious. 

Thai people long used green papaya in grated salads - just a mixture of papaya, carrots, ginger, garlic, rice vinegar, and oil. Absolutely delicious. Or, they also make papaya soup (I have not ventured that far yet).


Papaya is extremely prolific. If you are into "prepping", what better plant than papaya to prep. Most people, even native Floridians, will walk right past it, not giving it a second thought. Some people think it's poisonous. If you are not into prepping, it is still a great substitute for potatoes and zucchini, because it is lower in carbs, has lots of fiber, and it is mainly water, so it is good for dieters. All that refers to green papaya. The ripe ones are high in sugar and carbs, but nevertheless, delicious and full of vitamins.

It is practically impossible to buy organic squash in the store, and if you are able to find it, it is outrageously expensive. Green papaya is just as good, grows organically with no issues, and is essentially free. I rarely water it, don't fertilize it, and just collect the harvest.


Papaya is a pretty tree, tropical looking, and decorative. Even if you are in a subdivision, I doubt you will have much push back from the HOA Nazis for growing an "unapproved" vegetable. It's just plain pretty and requires very little care.

So, where do you get it and how do you care for it?

I got my first one at Publix, many years ago. Being naturally curious, I put some seeds in the garden, and some time later, I don't even have to plant it anymore. It magically grows all throughout the garden for reasons unbeknown to me.  

Pick the elongated, oval type. The round ones don't have seeds, and are tough and tasteless. Take the seeds out, rinse them, and sort the darkest and largest ones. Then, after the danger of frost, put some seeds in the garden. Thin them to a foot distance, and once you have some trees growing, thin yet more. Papaya needs at a minimum of 4ft by 4ft square to itself. But you don't need many trees. Just a couple, or a few, depending on your family tastes, will be enough.

It likes a semi-loose soil. It will not grow just on a lawn. It has shallow, rope-like roots that spread out in all directions. You can plant other shallow rooted vegetables right next to it. I am experimenting with planting tomatoes next to the papaya trees that act as natural support. 

Sometimes, when the tree is loaded with fruit, and there is heavy wind or rain, the tree will fall over. Oh, well. Just chop it up to the compost, and before you know, you will have dozens of papaya seedlings sprouting all over the place, providing you with a delightful sight, and a versatile organic food.


December 9, 2015

Growing Coffee in Florida

A while ago Publix used to sell little Angel Trees. I always liked to ruffle through these cute puppies that were just begging to take them home. They were always some unusual and exotic seedlings; some died, some survived. Among few of these floral treasures was a little coffee tree, not more than a few inches tall. Following the directions on the label I transplanted it to the larger pot, and that was mostly the extent of my care for this plant. The next winter it almost froze to death in my unheated green house.

Surprisingly, it grew new shoots from the root and became even prettier and bushier than before. Inspired by such unexpected horticultural success, I ordered three more coffee plants from ebay. At that time Publix was not selling coffee seedlings anymore.

Time has passed, and short five years later I have a mini coffee forest that's not only a pleasure to the eye, but also a producer of some fine Arabica.


Even though coffee is a tropical plant, it does not like Florida's radioactive summer sun, so it must be planted in a semi-shade environment. I planted mine right next to the 6 foot wooden fence, in large containers, close to each other. Thinking back, I should have cut the bottoms of the containers to allow for root growth. And maybe I will venture to do that this coming spring, although this will not be an easy task: these containers are extremely heavy. The reason for planting them in containers was that coffee does not like soggy soil either. In the summer, even with all the sand, water can stand close to the surface, so coffee roots will rot. It might sound like coffee is a picky plant, but actually it is not. Just provide a semi-shaded corner or side of the fence, protect it from direct sun and wind, and don't let it sit with wet feet. Give it some fertilizer, water when soil surface becomes dry, and that's just about it.


They started fruiting the third year, but only produced a few beans. This year, however I am having a full harvest. Coffee beans cover the branches just like berries, prolifically, but not evenly ripening. It is a chore to keep picking and processing the harvest. I came to appreciate coffee that comes from Brazil or other countries for relatively cheap price compared to the labor needed to make a final product.

After picking ripe beans (they will be soft and dark red in color), the beans need to be soaked at least 24 hours in tepid water. The water should start bubbling - that's when you know coffee had fermented. I have no idea whether commercial processing involves fermentation, but that's something I found on YouTube when I was searching for some information on how to shell the beans. It is practically impossible to shell them without soaking.


This is my third harvest this season. After shelling and drying this amount will reduce to about one fourth in volume. Actually, the outer skin is soft and juicy, and sweet to the taste. But I don't know whether it's edible, so I err on the side of caution.

After soaking, you have to squeeze coffee bean from the pulp and leave it to dry on the counter, mixing once a day. The drying process takes about a week.


The fun part, of course, is making coffee from your own harvest. But before that coffee beans need to be roasted. I tried this once, and have to admit that this will be a skill requiring mastering. I messed up my first batch - did not use cast iron skillet, just used the regular one, and I burned it a bit too much. But still, how sweet are the fruits of one's labor. I thoroughly enjoyed my organic, hand grown cup of coffee.

At the end of this season  I estimate I'll have about one to two pounds of dry coffee beans from my four trees. Using simple math, if your family consumes 20 pounds of coffee per year, then you need 40 trees: if I get 2 pounds from 4 trees, then to get 20 pounds I need 4 times 10 = 40 coffee trees. This might sound like a lot, but if you have some room, maybe a fence around the property, or other shaded area, you might be able to squeeze them in. The other consideration is a large number of blankets to cover them in the winter when it freezes. It takes me three comforters to cover my four coffee trees : they are literally butt to butt next to each other. So one comforter goes on the top, and the other two to wrap around the bunch. They absolutely need to be covered securely; Christmas lights will not be sufficient. 

All in all, coffee is pretty easy to grow. Not as easy as papaya :) or other natives, but not too difficult either. Some labor covering them on frost nights, and harvesting and processing the beans - otherwise a pretty and useful plant. Consider it.


November 12, 2015

Florida permaculture for busy people

It's that glorious time of the year when the caring government changes the clocks in order to save ... whatever they originally decided to save. For those of us with regular day jobs this means that we have no time to garden for it is pitch dark at 6 PM.

Joking aside, how do we garden when weekdays are shot, and weekends are torn apart between other responsibilities. I had faced this problem for a few gardening seasons now; summer is dedicated to fighting the lawn, and winter - our best time to garden - is robbed of available light time.

Over a few years that I had the garden at this place, and even four years that I had this blog, my garden had significantly evolved. I started like everyone else, from trying to grow the usual suspects that could be found in the produce isle, to gradually abandoning this time-consuming assortment, and moving towards local, native, perennial, and self-taking-care-of.

With experience, a touch of bravery, and a bit of taste adjustment, food can be grown by itself, especially in year-around gardening season place like Florida. It is scary, from a consumer perspective, to abandon tomatoes, beans, cucumbers, and squash. But with the exception of cucumbers, the rest can be substituted by native self-growing plants.

I created a new label that I'm calling "Garden Evolution". Muses like this one will be filed under this new label to describe the journey my garden took towards self-sustainability. Trust me though, this journey is far from being fully explored.

Today I'll start with the greens. If you read any of my posts, you would know that I am an avid greens grower and consumer. I love my greens, and quite frankly, that's what I mostly eat. From late October till late April greens grow like weeds in Florida, especially non-picky ones like bok choy, collards, mustard, and sakurajima greens. But what if you don't have the time to even put some seeds into the ground and water it once in a while?

Enter permaculture. This native Asian plant is making in-roads in the USA and is becoming more and more known thanks to well loved You Tube personalities (you know who!). This plant is Okinawa Spinach.


Yes, it looks like a big mess of leaves, and that's what it is. This huge bush that is completely overtaking my 4x6 raised bed, started from a little rootless twig that I bought on eBay. I let it establish in a container for a few months and then transplanted it to the garden. Okinawa Spinach, at least in hot and humid Florida, likes shady moist places. It needs regular harvesting of the succulent ends (yeah, eat it!) so that it can bush out instead of crawling far and skinny. 


The beauty of this plant is that it requires no care (other than being planted in a favorable environment as I mentioned above). It suppresses the weeds underneath - another useful feature, and it is tasty. I should admit that it is an acquired taste. It definitely has "taste" for it is spicy, but not hot spicy. It just has much more flavor than any green you can buy in the store. I eat it raw in salads. But it can easily be sauteed, steamed, boiled, made into an omelet, or whatever creative heat processing you can come up with. And it grows by itself. Not only that, it can be easily propagated by cutting the stem and rooting it in the container (no rooting hormone required). 

If you are trying to convert the front lawn into food forest or edible landscaping , take note of this candidate. It can be grown as a centerpiece of a flower arrangement, or as a border plant. It can be grown under the trees, in containers, in lieu of the border shrubs. Anything goes with Okinawa Spinach, but as I mentioned, in Florida it needs shade and moisture. So, plant it on the East or North side of the house. 

Lastly, a close cousin of Okinawa Spinach is Molokai spinach, or Longevity Spinach.


Its leaves are green, as opposed to reddish-purplish color of Okinawa. The taste is milder, but it is not as juicy. Growing requirements are the same. It is also believed to lower cholesterol, hence one of its nicknames, "Cholesterol Spinach". 

Well, there you have it. With just these two plants we solved the problem, at least partially, of not being able to grow greens in the summer, or any time when weather, daylight saving, or job does not permit gardening.


April 16, 2015

Companion Planting

In my never ending quest to grow more greens and to extend greens growing season I am experimenting with companion planting, and especially with growing dense and mulching heavily.

What tipped me off in this direction was the experience of harvesting sweet potatoes during some dry times of November. As I pulled the vines that covered the ground densely, I noticed that the ground under the vines was wet and cool while the rest of the garden was suffering from thirst. As I harvested all the potatoes and discarded the vines to the compost pile, the soil where the sweet potatoes were dried out within a day.

Usually regular greens like kale and collards are pretty much done by June. They simply stop growing and wilt away. I accepted that fact as part of Florida growing seasons. But this year I am trying to extend my greens well into the Summer.


The idea is to cover the soil with plants having no empty areas so that the leaves would shade the soil and keep the moisture in while lowering the soil temperature. I am diligently mulching the beds with grass clippings and so far the method works.


The bed above has collards, Buttercrunch lettuce, buckwheat, and bush beans growing together densely, and mulched with a layer of grass clippings about two to three inches deep between the plants. Granted it is not July yet, but we had some over ninety days, and the plants did not wilt. It also helps that this bed gets shade in the afternoon.


The curly leaves in the picture above is Russian Kale. I stumbled upon the seeds at Tractor Supply and just had to try them. It is amazingly juicy and tender kale, and now is my favorite. This kale is interplanted with beans, buckwheat, and broadleaf mustard greens. I am very curious as to what will happen to these beds in the mid-Summer. I am seriously hoping to have enough greens for my salads from these beds; it is definitely a worthy experiment.

April 11, 2015

A different kind of garden

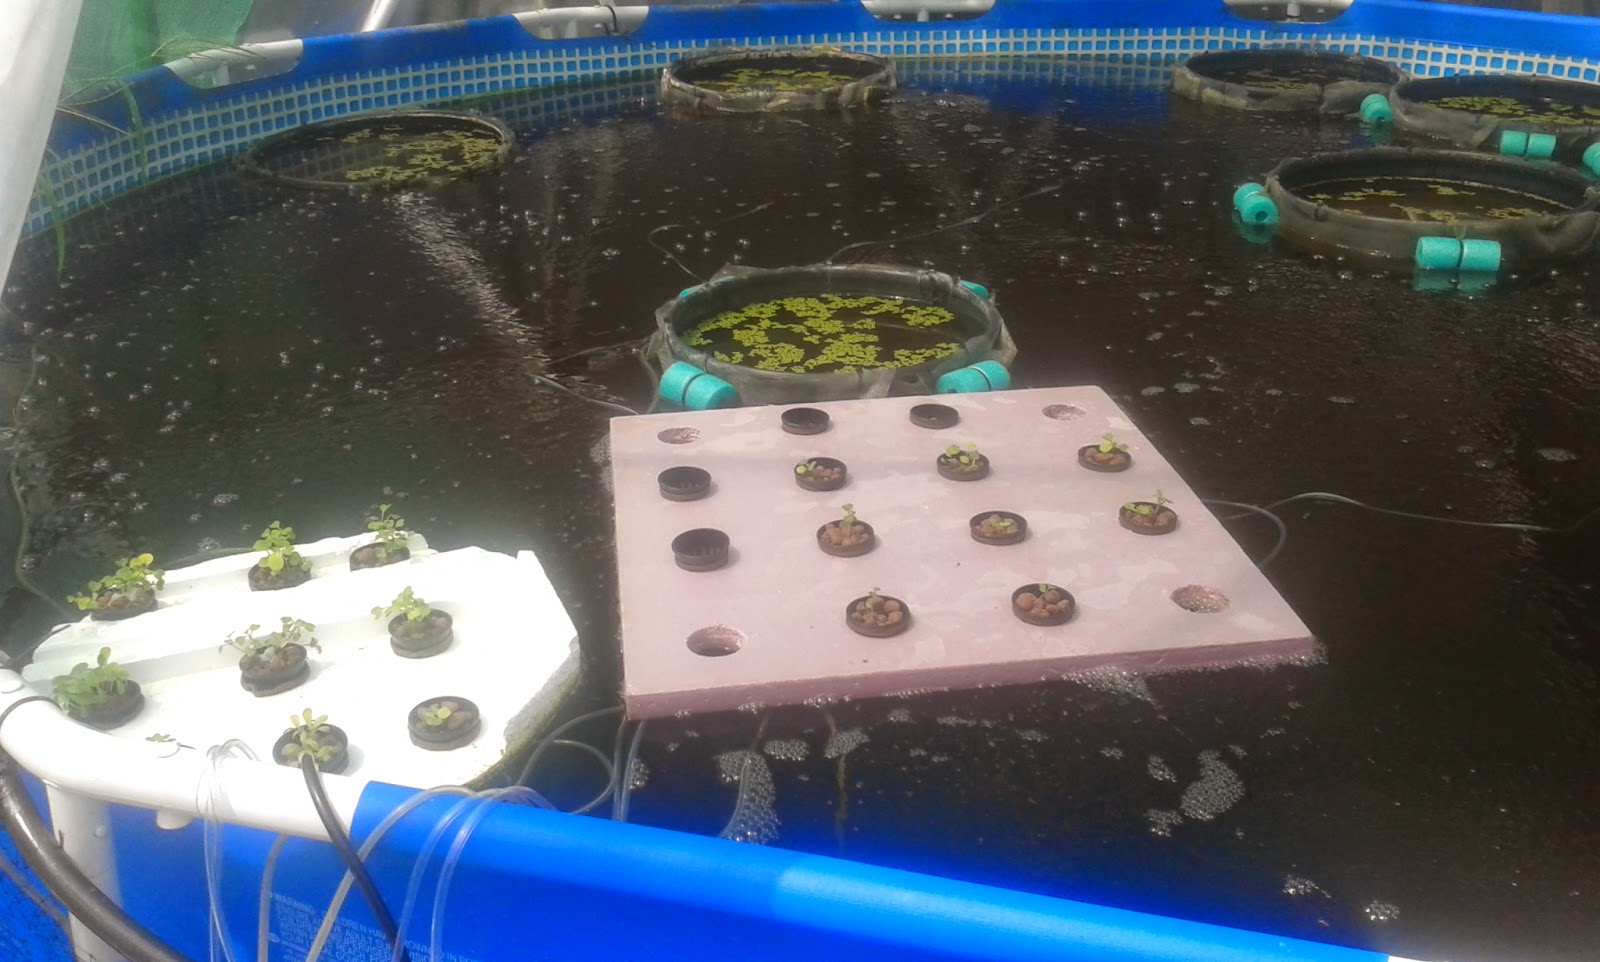
The beginnings of my aquaponics garden. More to come.


April 6, 2015

Sakurajima Radish - a resilient green for Florida gardens

If you are into organic greens, check out this awesome radish that has tasty edible greens. It is called sakurajima radish. It is grown in Japan for the greens and the root, and it is heat tolerant. In Florida it is very difficult to grow greens in the Summer time. After much experimenting sakurajima radish is one green that I grow throughout the Summer. I did try eating the root, but to my taste it was too tough and too dense. It might be good cooked, or fermented like they do in Japan, but at this point I only care for the greens, which are delicious, and did I mention they grow in the heat?

Here's what the root of the plant looks like (hiding beneath the abundant seed pods):


Once you've grown a few plants, they will provide the seeds for you in excess. In fact, sakurajima will re-seed freely if you let it. After a couple of years I have sakurajima sprouting up on the lawn and in garden beds, sometimes very far from where it originally grew.


And finally, here are the greens. Young greens taste good raw in salads, bigger ones are good stir-fried, boiled, or cooked in any way you like cooked greens. They can be seeded throughout the year, but please select a shaded spot for them to hide from the scorching Summer rays.


September 1, 2014

Composting with chickens

It's September, finally! We can get ready to start our most productive and enjoyable fall season.
I am cleaning my beds, ridding them of summer weeds, to prepare for the fall planting. This summer I let my beds overgrow with weeds, just did not have the time to weed or plant any cover crops. But, too many weeds is not as bad of a problem because all of them can be composted beautifully.

I use my darling Lawn Boy with the mulching bag to shred the weeds into small pieces.

It does a great job at that, and fast! I can shred a pile about 5 foot by 3 foot high in about five minutes.
Not every time, but quite often, I also mow the lawn with the mulching attachment to collect the grass for the compost.


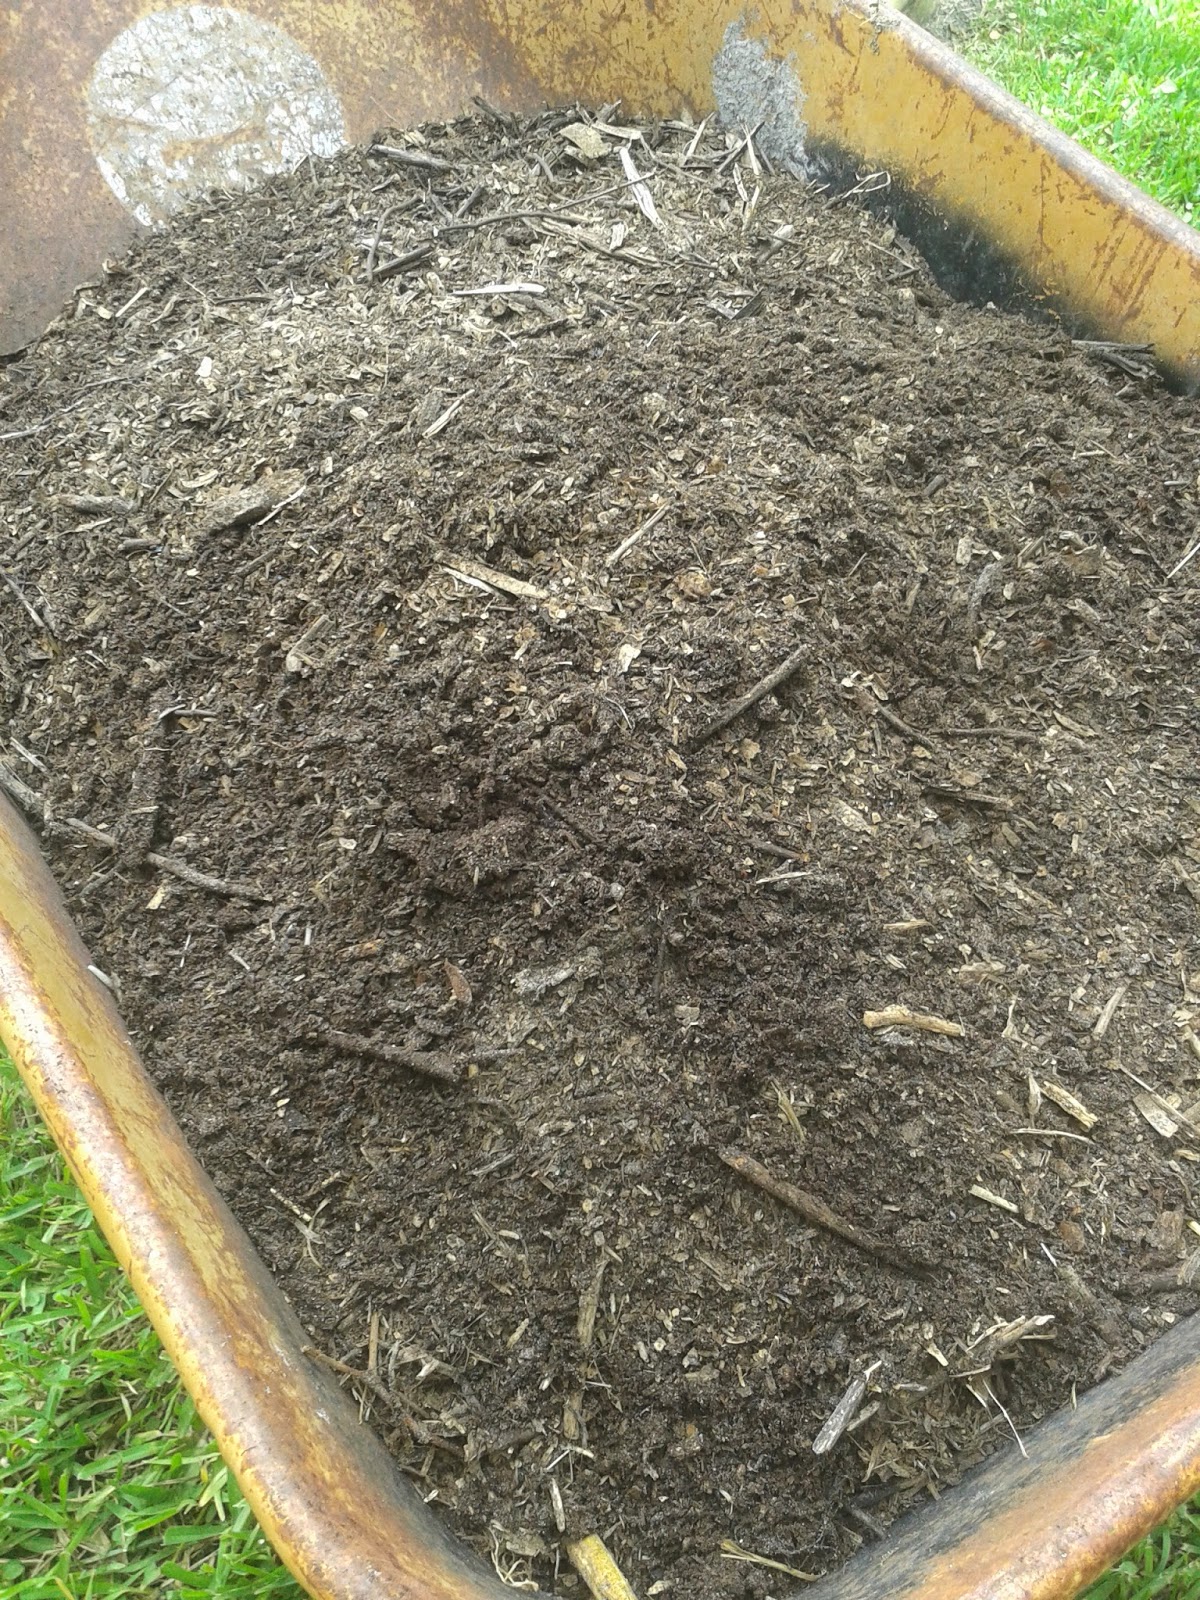
Here's the result of mulching a whole bunch of weeds and spent tomato vines from one of the beds. Took me just a few minutes to do this.


All that stuff goes into the chicken composting "bin". They love it. They pick out every last weed seed, as well as turn the compost many times while fertilizing and aerating it.

If you don't have chickens I do not recommend composting this way (shallow pile), because it is not hot enough to kill the weed seeds.

But composting in a low pile as opposed to the high piles with turning them over is much easier on the gardener's back. You can imitate chickens by raking the pile a few times. The other method I tried was to fill black plastic garbage bag 2/3 with chopped weeds, adding about a gallon of water, and then leaving it in the sun. It makes a nice compost in about a month or two.

And here is the result of chicken hard work:

It is nice, crumbly, free of weeds, and very fertile.

It is going on the top of my garden bed soil. I don't dig my beds, they are just getting layered in material, and worms do the rest of the work.

July 18, 2013

Greens in the Florida Summer

Greens? We know that in the summer we might as well throw in the towel, or a shovel... Nothing grows but cowpeas and okra.

Some months ago I planted, as an experiment, some sakurajima radish. Granted, I planted it a bit late, probably in late March, so when our infamous heat started frying the garden, sakurajiama went to seed. I only harvested maybe some fist size radishes, very short of promised watermelon size. But then the radish plants went into seed - not a bad proposition - I love my seeds, so I collected a few for the nest season's planting.

Well, to be fair, quite a few seed heads fell onto the ground, and now, voila! I have radishes sprouting everywhere, even on the lawn. To my surprise, this is one resilient radish.


And it is quite tasty too, if you don't let it grow oversize. To compensate for the lack of greens in my salads I now add these greens, combined with the still surviving bunching onion, purslane, some amaranth leaves, and still surviving curled parsley. It's organic, it's fresh, and it's free. Can I ask for more! Here's the start of the garden salad from the garden.


Note to self: next time collect more sakurajima radish seeds to have on hand for the summer greens.  Highly recommended!

July 7, 2013

Praying Mantis

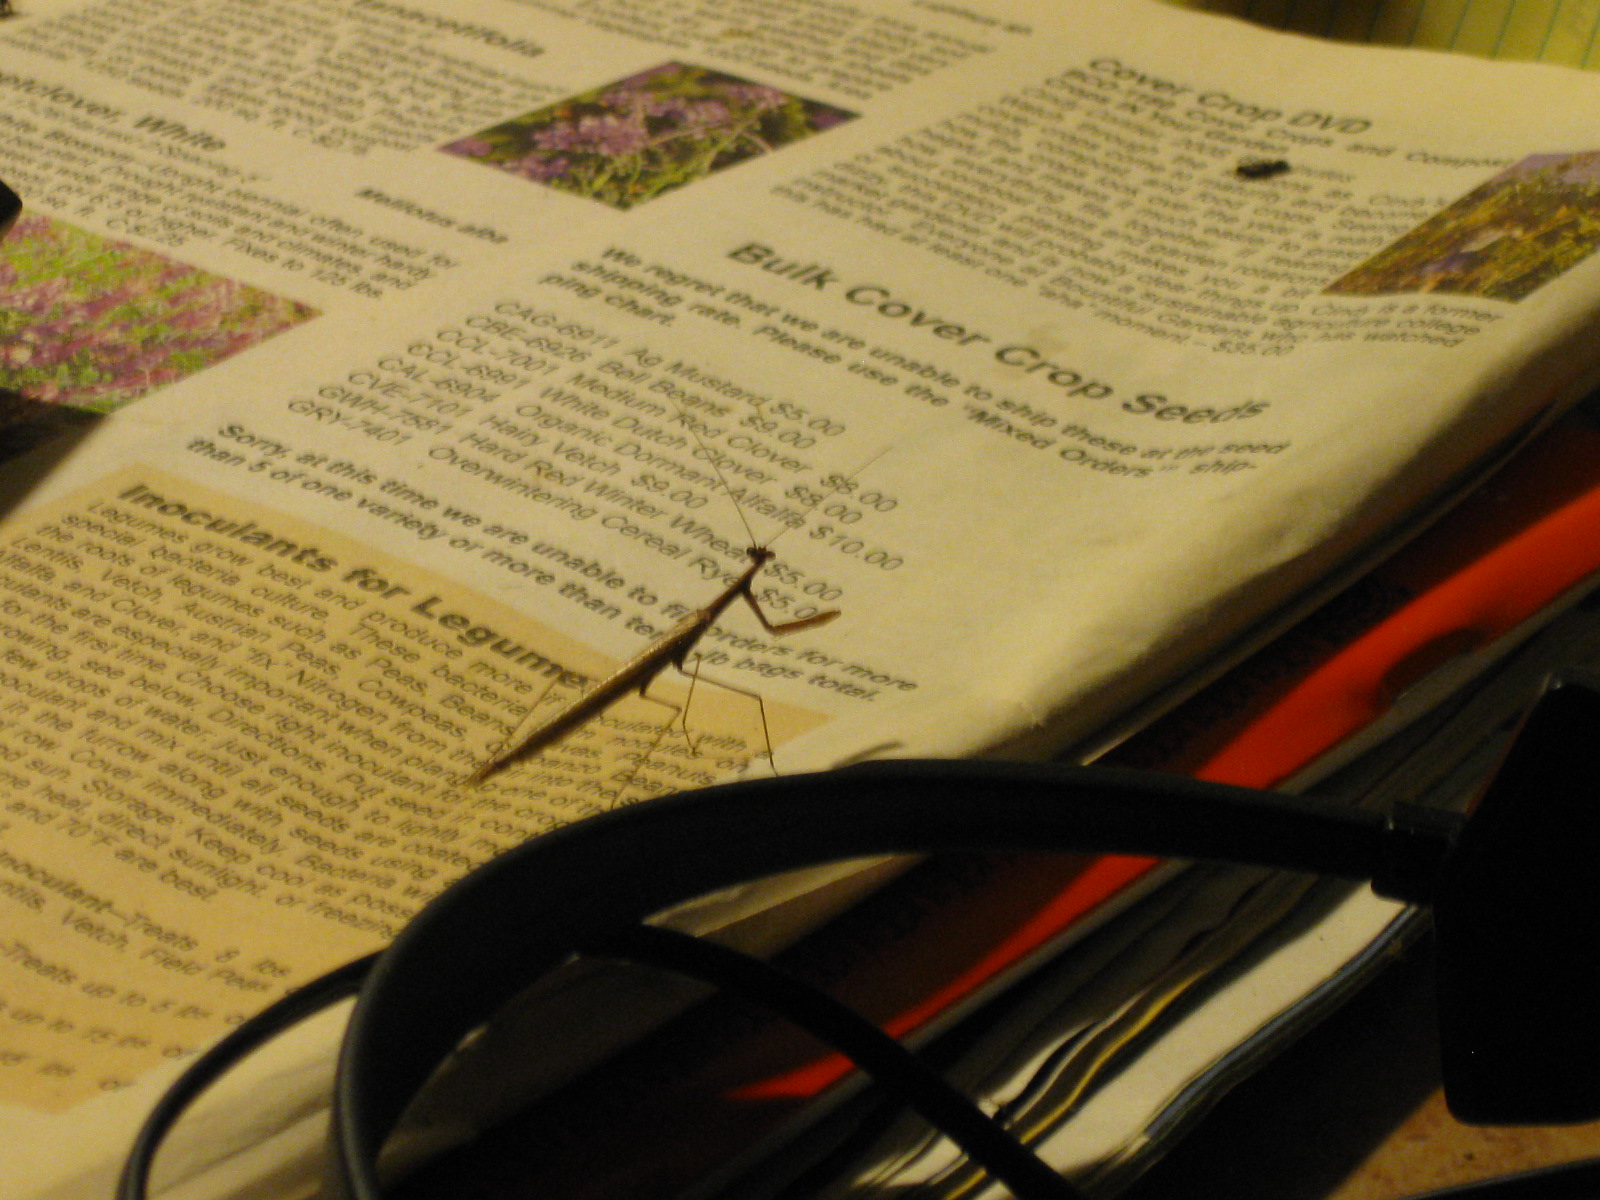
That's one bug you want to attract and keep. They are a predator insect, and feed on moths, mosquitoes, flies, and crickets, among other things.

This particular individual decided to land on my seed catalog. Maybe it was hinting at something, or was learning to read... In any event, this was a pretty fun picture to take.


So, when you see a little fella like this in your garden, do not shoo it away or kill it. It might do your garden a favor by eating a few bugs here and there.

July 3, 2013

More cowpea uses

This was a hint from my fellow gardener, Carol, who makes some delicious dishes out of green cowpeas. Usually, I cook young cowpea pods like green beans, or use dry cowpea beans in soups or salads (cooked, of course :))

Who would have thought that you can use green cowpeas like you would regular green shelled peas. You would want to pick the pods while they are still green, but "a little bit pregnant". You want to see these bumps on the sides of the pods:


Green cowpea pods


Then, simply shell them:

Shelled green cowpeas


I don't have tons of these to use right away, so I simply freeze the portions that I pick and shell. Afterwards, lightly steam the green cowpeas to the desired softness and use in salads or any other recipes that call for green peas.

May 22, 2013

Black Bean Salad

Grow what you eat, eat what you grow, right? So I harvested a half a pound of black beans the other day, and they were sort of "burning my pocket". I cave in and made a salad. Not to toot my own horn, but that baby came out just awesome. Full black bean salad recipe is here.

Here's what it looks like in a presentable bowl:


The best thing about this salad, aside from it being incredibly healthy and tasty, is that majority of the ingredients came from my back yard, and that in itself is a wonderful thing. So, if you are feeling adventurous, try the recipe of this black bean salad, and start growing some of the beautiful fruits of Florida's warm season gardening.

May 20, 2013

My experiment in black bean yields

I have to admit, I plant haphazardly. Whenever I want to plant something, like tomatoes, or peppers, I just find an available spot in my garden, and then I just plant it. It does work,  I grow quite a bit of food in my garden, but I wanted to figure out some planned yields of the vegetables that I plant. Hence, this experiment.

I want to figure out for sure what kind of yield I can get from a sample bed. I am experimenting with black beans at this particular point. I have planted some black beans from the grocery store bag in my newly created tree mulch bed. I did not do it for the yields, but to enrich the soil with the nitrogen that beans naturally give to the soil. I did not give good care to  these beans, nor that I expected any particular yields. But, so far, I have harvested a half a pound of organic black beans, which is pretty spectacular in itself.


I did not even particularly cared for the type of the bean to plant, all I cared for was to enrich the soil. But, given the choice of beans to plant, I went with the black beans because I just love them in my chili and re-fried bean dishes. This is May in Florida, and planting beans is somewhat late because of the heat. But I am going to perform this experiment anyway because I have a portion of the garden where it is shielded from the scorching sun in the afternoon. The bed is not huge, it is only 40" by 40#, but it is a good size for a controlled experiment. Here's what this bed looks in a late night (after work) photo:


 This bed is one my typical double-dug beds that I used to build in my garden. It is covered with about an inch of tree mulch that electric company delivers for free to the homeowners. The mulch keeps the moisture in, as well as keeps the temperature down. All in all, not a bad situation for the black beans.

Being true to the experiment I want to keep everything scientific, as much as I can. So, if I have a 1600 square inch bed, I need to plant 160 beans (roughly 10 beans per square foot). It was quite a chore, but I counted exactly 160 beans. Here's what 160 beans look like:


That looks awfully close to the amount of beans you get from a regular store bought package of bean seeds. And weighing these beans confirmed that; it is close to two ounces.


So, if we go by the regular expectations, then by planting two ounces of beans I should yield forty ounces of beans, or roughly two and a half pounds (1:20 yield). This number sound pretty incredible to me. I think I would be happy to get a half of a pound of beans from this 40" by 40" patch, but this would amount only to 1:4 yield.

So, the experiment is on. I have to admit that I will baby this patch more than I regularly care for the rest of the garden. But, if nature has its course, the yield should be pretty close to the expectations.

February 17, 2013

Fried collard greens from the garden

This year I am having an exceptional crop of collard greens. I seeded them in October, first in nursery containers, and then replanted into the garden. I have not grown collards before, but now this is one of my favorite vegetables. The leaves of the collards can substitute for the leaves of cabbage, as they are of the same family. In fact, collars are just like cabbage, but they do not form heads. It is pretty challenging to grow cabbage in Florida as our cool season is so short, but collards do seem to adapt to our weather pretty well.

Tonight is one of the last dog freezing nights and I wanted some comfort food. So, I picked fifteen collard leaves, two small heads of broccoli, and made a warming southern meal.

Full recipe is on my other blog, Vegetarian Cooking From Scratch. Now, this meal can be made with bacon or chopped hard boiled eggs to remove the "vegetarian" part. Full Recipe Here

And here's the picture before this dish was savored by me and my family:


February 16, 2013

Planting Vegetables in Wood Chips

I am trying something new. Instead of planting in soil, I am plating in wood chips. I did not plan it like that, it just sort of happened. I had a new set of raised beds built, but did not have soil for them. Then, after some research, I found that the beds can be filled with free wood chips that the power company delivers. The plan was thus born. I had a huge pile of wood chips delivered to my front yard, and there I went. Loading wheel barrows of chips and loading my new raised beds.


The wood chips themselves are not just pieces of wood, there are also chopped up small green twigs and even some palm leaves. That is a good mixture, although a bit poor on nitrogen (green matter), but still not totally devoid of this important nutrient.

Next thing I did was to seed some legumes. I am preparing this bed for the Spring planting of tomatoes, peppers, and eggplant. So the fast maturing legumes will serve as a cover crop. I planted the whole bed of black beans, just sprinkled with soil on the top of the seeds. Here they are starting to sprout:


And the rest of the beds I planted with cowpeas with the intention of tilling them in. I left a portion of the bed completely with no soil, as my test bed. Looks like cowpeas do not care if they don't have the soil. They are sprouting just as nicely:


I have cardboard on the bottom of these beds. Once cardboard rots it will allow the roots of my vegetables to penetrate even deeper into the soil below, under the decomposed wood chips. I do expect this whole concoction to pack down very heavily, but then I can always call the power company and have another load of wood chips to be delivered and added to these beds. 

I am very hopeful of this growing method, and in fact if this goes well, my next plan is to raise all my existing beds and add piles of wood chips to them.

November 20, 2012

Sweet Potato Invasion

Could not help but to brag... Here they are...


The best thing about these sweet potatoes is that I did not plant them. They grew from the remnants of the last year's harvest. I always leave the smallest roots in the ground when I harvest sweet potatoes, and the ones that survive frost start vining and fruiting once again. Another good thing about this amazing vegetable is that it breaks down hard soils. Sweet potatoes are relatively easy to care for, just water when they are young and make sure the soil has at least some nutrients in it. That's about it. 

Now, part of my Thanksgiving dinner is covered, for free. :)

November 5, 2012

Improve garden soil with legumes

John Jeavons calls beans "the givers" of the garden. And yes, they are; in more ways than one.

Just picked my second crop of green beans today, what a beautiful bounty.


This season I planted my all-time favorite Kentucky wonder (pole bean), as well as two types of bush beans - Italian and Nash. All of the beans are doing very well and are producing heavily. Beans and other legumes are the givers that improve the soil by binding nitrogen in the air to the soil. After the harvest is done we dig the stalks and leaves into the garden adding to the humus content of the soil. 

The good thing about Florida is that we can grow legumes year round. Maybe that is a gift from mother nature to compensate for our poor soils. But literally, there is not a time when we cannot plant or harvest some sort of legume. 

Right now it is too late, at least in Central Florida, to plant beans, but we can plant peas and Fava beans. That is in fact what I am planning to do this week - plant me some peas and Fava beans. I have about ten Fava seeds that I had for about four years or so, but never gotten around to planting. Hopefully they come up. And peas - we can plant them now, and all the way till March. 

All in all, looks like my Thanksgiving dinner is covered - I am going to try a new recipe this year for the green beans, and the main ingredient in that recipe will be the beans from my garden.


Florida Gardening

Florida Gardening Blog

Visitors from all over the world

Grow Your Own Food

Grow your own food, be independent, healthy and happy.